How to Make a Birdhouse Out of a Gourd

By David Hadbawnik
David Hadbawnik is Lankville’s premier authority on how to make a birdhouse out of a gourd.
TIME: 2-3 DAYS | COST: $0-50 (LANKVILLE) | DIFFICULTY: EASY TO MODERATE
Begin by selecting your gourd. A bottle gourd is your natural choice– it provides a wide, welcoming bosom that will be inviting and intriguing to birds.
Next, you will need to clean the interior. Use a drill to make a 2″ hole on one side. With a special gourd spoon (available by mail), scrape out the dried seeds and pulp from the inside. Be sure to save it though! It’ll make a tasty snack for later on!
Drop your gourd lovingly into a solution made from one part bleach, eight parts water and one part love…
Now you’ll want to sanitize your gourd– this is very important. Use sandpaper to smooth the exterior of the gourd and the inside edges of the entrance hole. Pay extra attention to the hole. Now, drop your gourd lovingly into a solution made from one part bleach, eight parts water and one part love 🙂 Just kidding! Nine parts water!
Completely rinse the gourd and then hang it on a clothesline to dry thoroughly. Don’t worry if a neighbor catches you hanging a gourd on a clothesline– there is nothing at all “mental” about this, as some former neighbors of mine have suggested.
Once the gourd is dry, you’ll want to use some exterior latex paint to decorate the outside of the gourd. Feel free to be creative! Me and some of my friends recently had a gourd birdhouse painting party on my patio and we came up with all kinds of wild designs! And don’t worry– if you’re “experimenting” and your design just doesn’t work out, you can always go back with some more exterior latex paint and you’ve got a brand new blank canvas. No worries!
When you’ve finished your design and added a couple of water drainage holes on the bottom, you’re ready to hang. Consider a sturdy branch– smaller, thinner branches have a tendency to “break”, which could lead to a disaster and a waste of a lot of hard work.
And last but not least– ENJOY!
DHad
Leave a comment
ACCOMMODATIONS

When staying in the Area Beyond the Outlands, pick the Murray. Friendly, creative staff, delightful beds, curtains. Phone Far Outlands 5-6712.
LANKVILLE DAILY NEWS: IN BOOK FORM!

The book is gone. It will never return. We hear stories but they are likely false. We live in the woods now. We make fire with a lighter that we found in the street. It was crushed by a truck but, somehow, perhaps through some intervention that is beyond us, it still works. We are waiting. We are waiting.

Original Pondicherry Association News promotional advertisement (2009)
TONIGHT ON TV! RICHARD AND THE POSTMAN REUNION SPECIAL!

The Hit program from the 1970's returns to Lankville TV tonight on LBC!
ADULT ADVERTISEMENT

Women all over Lankville are just sitting at mammoth computers waiting to hear from men like you! Just insert a floppy disk, write a (non-sexual) message and let the sparks fly! (Computer not included).
ADVERTISEMENT

A Vitiello Decorative Ham makes a great gift. Show that you care today.
BANDED DUFFELS ON PALLETS
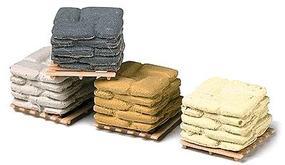
Assorted colors. Whatever you want to do, man. Call Lankville Falls, 3247.
BRIAN SCHROPP IN THE LANKVILLE DAILY NEWS

The most important cuisine articles ever written.
CANDY

Jipps Co. Full Service Candy Counter! Our alert girls will push gummy drops into special paper sheaths, engage in restrained pleasantries and explain chocholate-to-nougat ratios. Call Central Lankville 3614.
CAT PHOTO

In compliance with Lankville subsection 11:16-4.
CHAMBERS CO. HAND DRILLS: When Electricity is Not an Option

When electricity is not an option consider the Chambers Company hand crank drills. Perfect for use in tight spaces, on distant islands or for drilling holes in fences to see TITS. Call 4-2309.
EMPLOYMENT

Big Ed's BBQ Shack is looking for a part-time waitress. Someone who doesn't nose around and ask a lot of difficult questions. Call Lankville Rougher Area, 5-2100.
EMPLOYMENT

Nuts, Ah! is looking for an experienced nut-handler. Experience with bagging nuts also important. If you break the nut sack, the nuts will drop onto the floor. Come in person for application to Twin Removed Pines Mall. NO CALLS.
FOX FOR PARTIES

Hire the Poetry Fox for Your Child's Next Party. Reasonable rates. Writes poems, dances, will not stand for any shenanigans. Call South Lankville 2009.

The funny stories of Dick Oakes, Jr. have thrilled millions. Look for them today in The Lankville Daily News!
GELSINGER’S ALLURE CLUB

Topless, bottomless wonderland. Mysterious back rooms. Carpeted entirely in astroturf. NO CALLS.
GREBOV BROTHERS TELESCOPE COMPANY

The Grebov Brothers are Lankville's finest purveyor of telescopes for astronomy enthusiasts. Substantial 4.5" apertures and fast f/4 focal ratios provide bright, detailed views of solar system targets like the Moon and planets, as well as wide-field celestial objects like nebulas and star clusters but also TITS.
GUMP PENETRATES

Only in The Lankville Daily News
HADBAWNIK HAUNTED STAIRCASE COMPANY

The Hadbawnik Company is Lankville's #1 installer of haunted, brush-littered staircases. Friendly non-foreign staff! Call Western (Outer) Lankville, 2154 or 2198 today.
HADBAWNIK HAUNTED BRUSH PILES!

The Hadbawnik Haunted Staircase Company is now offering haunted brush piles for use on your staircase. Create eerie, supernal ambiance. Allow the brush to blow haphazardly in the wind, creates fear, foreboding. Call our friendly staff of white people at Western Lankville, 2154. Brush piles may contain other forms of yard debris.
HEY! WANT A MONKEY?

Hey! Want a live little monkey? They do cute things like climb into pumpkins. Call "The Captain"- Central Lankville Hills, 5264.
HOME DUMP Your Neighborhood Hardware Store 16 Lankville Locations!

Weekly Special: Primitive Forged Hooks. Buy 4, Get a Can of Paint. Or Maybe Not. You'll Just Have to Find Out.
INFLAMED BY STARS AND BLOOD

Lankville's Premier Science Fiction and Horror Magazine Now Appearing in The Lankville Daily News!
JOHNNY PADRES, OPTICIAN

Lankville has been relying on Dr. Johnny Padres for their optical needs since 1973. We offer a full service family eye care center and provide examinations for glasses and contacts and have a large display of designer, traditional and innovative eyewear for both regular prescription eyeglasses and sunglasses all of which will enable you to see TITS better. Call Lankville Business 2618-2.
LETTER SACK
| brendastevens2013 on Journey of a Christian Soldier… | |
| Isabella Novak on What Happens When Nobody Picks… | |
| Jade Gorman on Funny Stories by Dick Oakes,… | |
| barlowhockey on News in Brief | |
| oversion on Samways and Fick: Identity… |
LIFE LESSONS FUNERAL HOME

Life Lessons Funeral Home has been helping Lankville with dead people since 1932. Contact Eddie or Stummins, Lankville Business, 5-2161.
LOOK AT THESE BEAUTIES!

Really some of our best ever! Have you ever seen anything like it? Call Kelly (male) at Lankville Sound 2615.
MISSING

Missing: adult penguin. Christ, I just let him out in the yard for one minute and now he's gone. Responds to the name "Richard". Call Lankville Eastern Outlands, 5-6213.
NOW PLAYING!

The Unhinged: A New Film by Tom "Vapor" Rayford. Crisp Street Cinema, Eastern Lankville
PINEAPPLE CITY: A New Way of Being

Pineapple City is a new way of being, feeling and having your shirt off. Located in the distant, barren Lankville Pines, Pineapple City is now accepting applications for sheds. Call PINES, 2-5771.
THE PUZZLER

In the pie chart above, what segment represents a certain specific strata of the general population?
REAL ESTATE

Little shed for sale. With door, mailbox, dirt plot. Site of multiple murders but don't worry, they happened around back. To inquire, come to the shed. Go around back.
REAL ESTATE

Four acre lot in Eastern Lankville Cove Area. Price reduced! Site of a fireworks display in which several people fell out of their lawnchairs and died. Locals believe it haunted but that's crap. Call Cove 2751.
THE RECKONER EXACTRA 2.0 : A Danny Madison Product

It's Your Time: CALCULATE
SARAH SAMWAYS: CONTRIBUTING FEMALE

Exclusively in the Lankville Daily News (and some other papers).
SPEAKING ENGAGEMENT
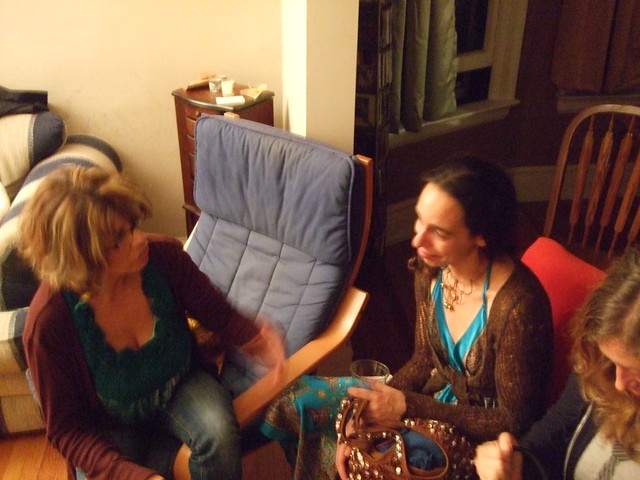
Robin Brox will sit around and get progressively more intoxicated while listening to this other broad natter on about something. LANKVILLE REGIONAL AUDITORIUM, August 4, 11PM.
SPEAKING ENGAGEMENT CANCELED

The Dr. M. Chambers speech and candy-making event has been canceled again following Dr. Chambers' sudden collapse into some baskets. New date TBA
TRAVEL TIPS by Randy Hammers
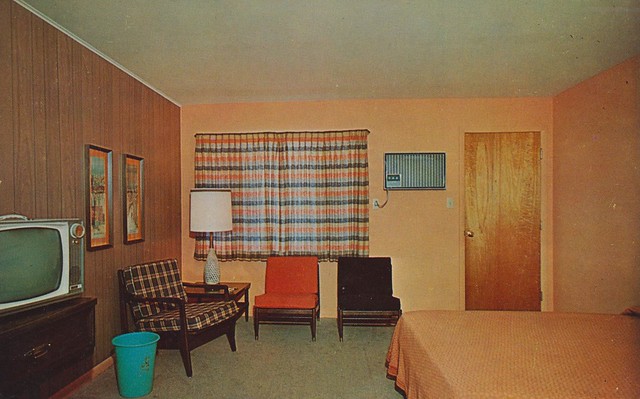
The Kum Back Inn in the Lankville Desert Area has long been serving road-weary travelers. They feature a restaurant (with cocktails) and two spacious conference rooms. The Kum Back boasts 65 units-- each including window dressing, some chairs and a larger chair (seats two smallish children), a bed with orange comforter, a plastic trash can, clever paintings, and a windowless door. TV also available in 17 (sometimes 19) rooms. Most of the rooms are air-conditioned. Oscillating fans available upon request. Illuminated carports will protect your vehicle from the vicious sudden dust storms that often overtake the Desert Area and the wild thieves that occasionally parade across the landscape like some unmentionable horror. Call now at TU-0780 and ask for Bud or Karen (married).
UTILITY YARD SHEDS
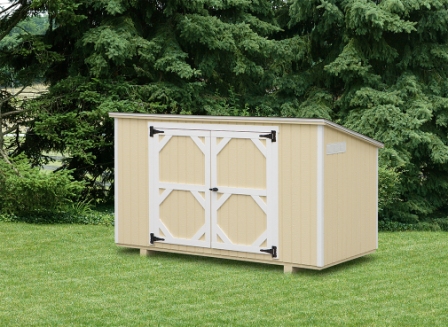
The Lowinger Brothers offer great utility yard sheds at low prices. This one is haunted. Call Lankville Port Area 1072.
VACATION PACKAGES!

Spectacular vacations in campers by little mountains. Your cares will melt away but you will have to be careful of that shack (pictured). A lunatic lives there. Call Mercantile District 2711.
WRESTLING TONIGHT!

8PM, Southern Lankville Man-Arena. Featuring Ric "Wild Boy" Tipps (green trunks).
ZACH KEEBAUGH INVESTIGATIONS

Only in The Lankville Daily News

I don’t know but what if the gord has black spots on it. I have this one with spots around the bottom part and, do you keep the stem on? We are making soup!
Stems are optional, Dany! Good luck this season, and enjoy your soup.